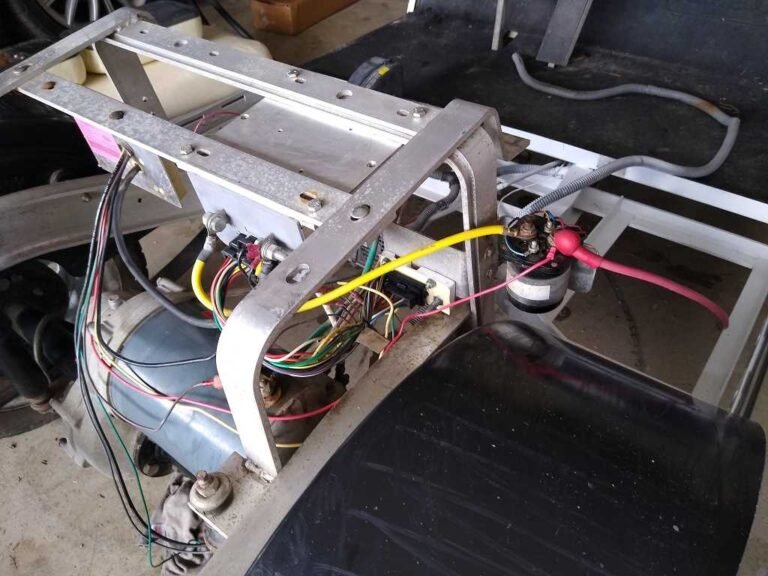
What Does It Mean When a Solenoid Is Hot?
A solenoid that is hot to the touch is telling you that excessive current, high resistance, or both are generating dangerous thermal energy inside the unit. Here is how to tell normal warmth from a real problem, and how to fix it.
- A solenoid too hot to hold for more than two seconds (roughly above 150°F) is experiencing dangerous thermal stress, not normal operation.
- The number one cause is a loose or corroded terminal connection; even 0.01 Ohms of added resistance at 300 amps produces 900 watts of wasted heat.
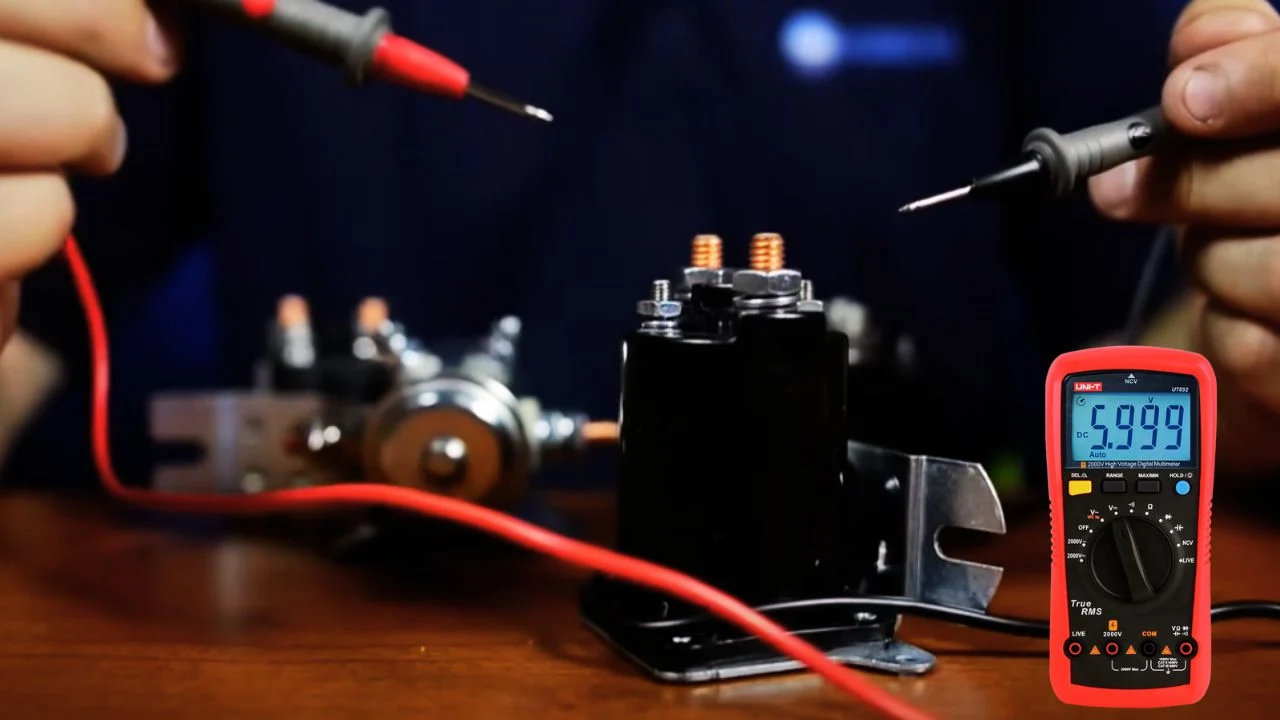
- A millivolt drop test across each terminal under load is the fastest way to isolate the exact source of the heat.
- Ignoring a hot solenoid leads to a predictable cascade: pitting, melted insulation, welded contacts, and in extreme cases, fire.
You reach under the seat of your golf cart and the solenoid housing burns your fingers. That heat is not normal, and it is not something to ignore. A solenoid that is hot to the touch is telling you that excessive current, high resistance, or both are generating dangerous thermal energy inside the unit. Left unchecked, this condition leads to welded contacts, melted wiring, and potential fire.
If your solenoid is hot and you also notice the pre-charge resistor getting warm, the two issues are often linked. See the solenoid resistor diagnostics guide for the full cross-diagnosis protocol.
Normal Warmth vs. Dangerous Heat
Every solenoid generates some heat during operation. The activation coil draws continuous current whenever the cart is in motion, and the main contacts experience resistive heating from hundreds of amps passing through a relatively small copper surface area. A solenoid that is mildly warm after a 30-minute drive across hilly terrain is operating within its design parameters.
The warning signs begin when the housing becomes too hot to hold comfortably, above roughly 150°F / 65°C. At this temperature, the copper contacts inside are experiencing localized hot spots that can exceed 300°F. This level of thermal stress softens the copper, accelerates oxidation on the contact faces, and dramatically increases the probability of the contacts welding shut during the next engagement cycle. An infrared thermometer gun is the ideal tool to measure the exact temperature; the same technique covered in the thermal imaging for batteries guide works perfectly on solenoid housings.
Five Causes of Solenoid Overheating
1. High-Resistance Terminal Connections
This is the number one cause. When the large terminal nuts are loose, corroded, or connected with undersized ring terminals, a resistive junction forms at the post. Ohm’s law dictates that power dissipated as heat equals I squared times R. Even a tiny increase in resistance, 0.01 Ohms, at 300 amps produces 900 watts of heat concentrated at a single point. The fix is simple: remove each cable, clean the post and terminal with a wire brush, apply dielectric grease, and torque the nut firmly.
2. Undersized Solenoid for the Current Draw
If you have upgraded your motor controller to a high-output unit like an Alltrax or Navitas but left the original 200-amp solenoid in place, the contacts are carrying current they were never designed for. The solution is upgrading to a 400-amp heavy-duty solenoid.
3. Pitted or Partially Welded Contacts
As solenoid contacts wear from repeated arcing, the once-smooth copper surfaces develop deep pits and craters. These irregular surfaces reduce the effective contact area, concentrating all current flow through a few tiny high points, which creates extreme localized heating. The contacts may not be fully welded yet, but they are on their way. See the welded contacts diagnosis guide for the complete failure progression.
4. Continuous Duty Cycle Abuse
Stock golf cart solenoids have continuous-duty coils, but their contacts carry a fixed current rating (White Rodgers rates its 586, for example, at 200A continuous). Dragging heavy loads up steep inclines for extended periods keeps the contacts at high current for far longer than a stock part is sized for, and they overheat because the current never drops low enough for them to cool. A coil fed the wrong voltage, or an intermittent-duty coil fitted by mistake, adds its own heat on top.
5. Missing Pre-Charge Resistor
Without a pre-charge resistor, every solenoid engagement produces a massive inrush arc across the contacts. Each arc event deposits a thin layer of carbon on the copper surfaces. Carbon is resistive, so each engagement makes the next one hotter. Over hundreds of cycles, the contacts become so carbon-fouled that they generate significant heat even under moderate current. See the precharge resistor sizing guide for the correct installation.
Step-by-Step Heat Diagnosis
Follow this protocol to isolate the source of the heat:
- Disconnect the battery pack and allow the solenoid to cool completely. Never work on a hot solenoid with live power.
- Inspect all four terminal posts. Look for discoloration (blue or brown tinting on the metal), melted wire insulation, or white/green corrosion buildup. Any of these indicate a high-resistance connection.
- Perform a millivolt drop test. Reconnect the battery pack. With the cart running under load, measure the voltage directly across each large terminal post and its attached cable lug. A healthy connection shows less than 50 millivolts of drop; anything above 100mV is a problem generating significant heat.
- Check the solenoid’s amp rating printed on the housing label. Compare it to your controller’s maximum output amperage. If the controller can deliver 400A and the solenoid is rated for 200A, that is the problem.
- Test the coil resistance. Measure across the two small posts and compare the reading to the manufacturer specification (for example, White Rodgers lists about 189 ohms for its 36V and about 336 ohms for its 48V continuous-duty 586 coil). A reading significantly lower than spec means shorted turns, which draws excessive current and overheats independently of the main contacts.
Coil Heat vs. Contact Heat
It is important to distinguish where the heat is originating. If the heat is concentrated at the top of the solenoid housing near the large posts, the main contacts are the source. If the heat is more evenly distributed through the body of the housing, the activation coil is overheating.
A coil overheating independently usually means the coil insulation is breaking down with age, causing partial shorts between windings. Each shorted turn reduces the coil’s total resistance, which increases current draw from the activation circuit. Eventually the coil draws enough current to overheat the thin activation wires, potentially melting the connector or blowing the activation fuse. On Yamaha carts with modular plugs, this is a common cause of melted plug housings.
What Happens If You Ignore a Hot Solenoid
Ignoring a hot solenoid leads to a predictable failure cascade:
- Stage 1, increased resistance: contact surfaces oxidize and pit further, increasing heat generation with every drive cycle.
- Stage 2, wire insulation damage: heat radiating from the housing melts insulation on adjacent cables, creating potential short-circuit paths. See the battery terminal melting guide for related thermal damage patterns.
- Stage 3, welded contacts: the copper contacts reach a temperature where they physically fuse during a high-current engagement, and the cart becomes a runaway vehicle. See the full welded contacts fix guide.
- Stage 4, fire risk: in extreme cases, melted insulation, battery off-gassing (especially lead-acid), and a continuously energized high-amperage circuit create genuine fire conditions.
The Complete Fix Protocol
- Replace the solenoid if the contacts are visibly pitted, discolored, or if the coil resistance is out of spec. Match the new solenoid to your system voltage (36V or 48V) and amperage requirements.
- Clean and re-terminate all cable connections. Use properly sized ring terminals crimped with a hydraulic crimper, not a basic hand crimper. See the cable voltage drop analysis for correct gauge sizing.
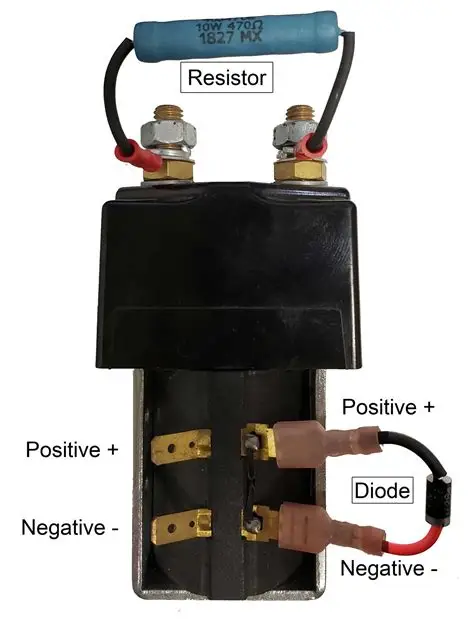
- Install a pre-charge resistor (250 Ohm, 10W) and a flyback diode (1N5408) to eliminate the two primary sources of contact degradation.
- Upgrade to a 400A solenoid if your controller output exceeds 250A peak.
- Apply dielectric grease to all terminal posts and re-check torque after the first 10 hours of operation.
A solenoid that is hot to the touch is experiencing excessive resistive heating from pitted contacts, loose terminals, or an insufficient amperage rating. Perform a millivolt drop test at each post under load, replace the solenoid if contacts are damaged, and always install a pre-charge resistor and flyback diode to prevent recurrence.
Frequently Asked Questions
Why is my golf cart solenoid hot to the touch?
A golf cart solenoid can be warm because the coil is energized, but painful heat usually points to excessive current, high-resistance contacts, loose cable lugs, undersized parts, a sticking contactor, or long heavy-load use. Heat at the large posts is especially suspicious because resistance there turns current into wasted heat.
How hot is too hot for a golf cart solenoid?
If the case is only warm after normal driving, that can be normal. If it is too hot to keep a hand on, smells burnt, melts insulation, discolors terminals, or shows a large voltage drop across the big posts while driving, treat it as abnormal and stop using the cart until the cable, contact, and coil side are tested.
Can a hot solenoid cause a fire in a golf cart?
Yes, severe solenoid heat can become a fire risk when it is caused by loose terminals, arcing contacts, undersized wiring, melted insulation, or a stuck high-current path. Disconnect the pack safely before inspecting the area, and replace damaged cables, lugs, or contactors instead of reusing heat-damaged parts.