Golf Cart Forward/Reverse Switch Test and Replacement by Brand
The forward and reverse switch does something most switches do not: it reverses the direction of current through part of the motor circuit. That is why its contacts take a beating, and why the way it fails is so distinctive.
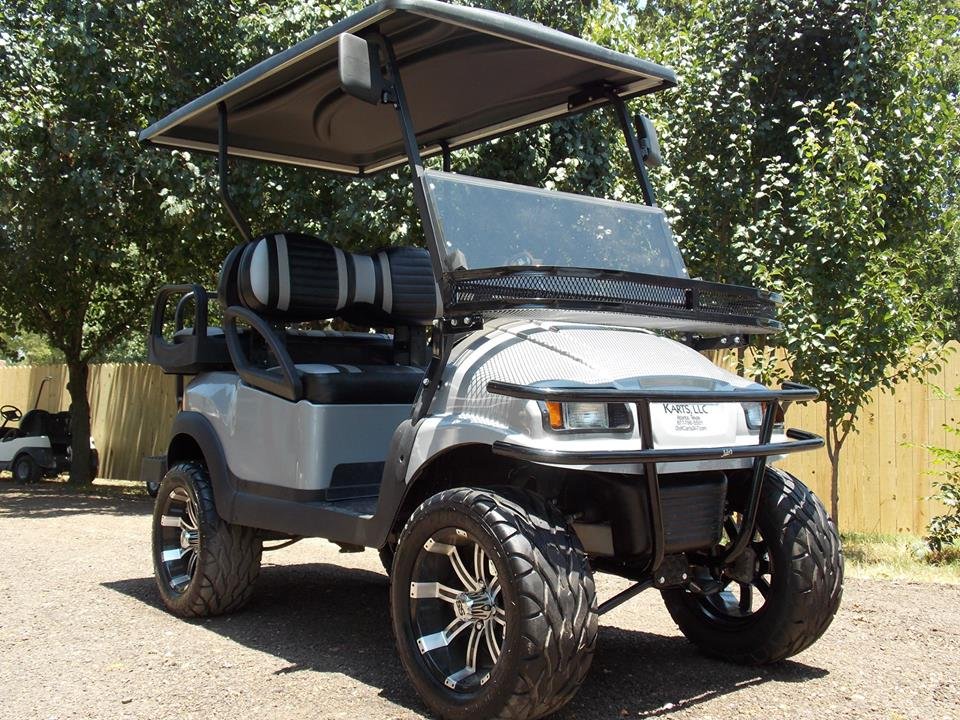
- The switch reverses current direction through the field or armature, which is what makes the cart drive backwards.
- On many carts it carries full drive current, so its contacts erode. On others it only signals the controller and carries almost nothing.
- Which type you have decides the whole diagnosis, so establish it before testing anything.
- The test is a continuity matrix: check every terminal pair in forward, neutral and reverse, and write the results down.
- One direction working and the other not is the classic signature, and it is nearly always the switch rather than the motor or controller.
Reversing an electric golf cart is not as simple as running the motor backwards. On a series wound cart the direction of travel is set by reversing the current through one winding relative to the other, and the component that performs that reversal is the forward and reverse switch. It is a deceptively demanding job for a switch, because on many carts the full drive current passes through those contacts every time the cart moves.
That explains both the symptoms and the failure pattern. Contacts that make and break under load erode, pit and eventually stop conducting reliably in one position while still working in the other. The result is the most recognisable fault on the whole cart: it drives forward perfectly and does nothing in reverse, or the opposite. Almost nothing else produces that specific asymmetry.
What the Switch Actually Does
A direct current motor turns one way when current flows through it in one direction. To reverse it, you reverse the current through one part of the motor while leaving the rest as it was. On a series wound cart that means swapping the connections to the field winding relative to the armature, and the forward and reverse switch is the mechanism that performs that swap.
Internally it is a multi-pole switch: several separate contact sets that all move together when you operate the lever or rocker. In forward, one set of paths is closed. In reverse, a different set is closed, wired so the current through one winding is reversed. In neutral, the paths are open and the cart cannot drive at all.
Because several contact sets operate together, the switch can fail partially. One set erodes while the others stay serviceable, and the cart loses one direction while keeping the other. Understanding that the switch is several switches in one housing is what makes the test below make sense.
Two Types, Two Different Diagnoses
This distinction decides everything that follows, and getting it wrong wastes an afternoon.
On many older and simpler carts, the switch is in the main power path and carries the full drive current. Its contacts are physically large, the cables running to it are heavy gauge, and it lives under the seat or near the motor. This is the type that erodes, overheats and eventually fails, because breaking a high current connection draws an arc every time.
On newer carts, and on any cart with a modern controller, the switch usually carries only a small signal. It tells the controller which direction the driver has selected, and the controller does the actual reversing through its own electronics. The switch is often on the dash, the wires are thin, and it fails from corrosion or mechanical wear rather than from arcing.
Tell them apart by the cable gauge at the switch. Heavy welding-cable-sized conductors mean it carries drive current. Thin harness wires mean it is a signal switch, and a failure in the reverse direction on that kind of cart may well be the controller rather than the switch. The contact erosion pattern specific to the high current type, and the heavy duty upgrade options, are covered in the F/R switch burnout guide.
Symptoms and What They Mean
The switch produces a small set of very characteristic behaviours, and each points somewhere specific.
| Symptom | What it usually means | What to check |
|---|---|---|
| Drives one direction, nothing in the other | One contact set has eroded or opened while the others still work. | Continuity matrix across all terminal pairs in both positions. |
| Works if you hold the lever hard against its stop | Contacts are worn and only meeting at the extreme of travel. | Mechanical wear in the switch and its linkage. |
| Intermittent in one direction, often when warm | Marginal contact resistance that worsens as it heats. | Voltage drop across the switch while the cart is under load. |
| Nothing in either direction, neutral seems permanent | Not usually the switch alone. Look upstream first. | Pack, key switch, tow and run switch, solenoid, controller. |
| A burning smell or discoloured housing | High current arcing across worn contacts. | Stop driving. Inspect the switch and its cables directly. |
The first row is the signature. If a cart drives normally in one direction, then everything shared by both directions must be healthy: the pack, the key switch, the solenoid, the motor and the controller all just proved themselves. Only the components unique to the failed direction remain, and on most carts that is the switch.
Check These Before You Test
Two things imitate a failed switch and cost nothing to eliminate.
The first is the linkage. Many carts operate the switch through a rod or cable from a lever, and if that linkage has bent, loosened or come adrift, the lever moves without fully operating the switch. The switch is fine and simply is not being pushed far enough. Watch the switch itself while someone moves the lever through its full range and confirm it is reaching both end positions positively.
The second is the connections at the switch rather than the switch itself. Terminals loosen with vibration and corrode with moisture, and a poor connection at a terminal produces the same lost direction as a failed contact inside. Inspect each terminal for corrosion, heat discolouration and tightness before condemning the part.
Golf Cart Forward Reverse Switch Test: The Continuity Matrix
The right way to test a multi-pole switch is not to check one pair and form an opinion. It is to check every pair in every position and write down what you find, because the fault is defined by what changes between positions rather than by any single reading.
- With the pack isolated, disconnect the wires from the switch so nothing else is in parallel with your measurement. Label them as you go.
- Draw a simple grid on paper: every terminal pair down the side, and three columns for forward, neutral and reverse.
- Set the meter to continuity or its lowest resistance range and touch the leads together first to note the lead resistance.
- Place the switch in forward. Test every terminal pair in turn and record continuous or open in the forward column.
- Repeat the whole grid in neutral, then again in reverse.
- Operate the switch back and forth several times and repeat any pair that looked marginal, since intermittent contacts do not fail on every operation.
Now read the grid rather than any single cell. In neutral, the drive paths should be open. In forward, one group of pairs should be continuous. In reverse, a different group should be continuous. A healthy switch produces a clean, symmetrical pattern: whatever is closed in forward has a mirror equivalent closed in reverse.
The fault shows as asymmetry. If forward gives you a clean set of continuous pairs and reverse leaves one pair open that should have closed, that pair is the failure and it corresponds exactly to the direction that does not work. A pair that reads continuous in neutral, when it should be open, indicates welded contacts and is equally conclusive.
Testing a High Current Switch Under Load
A continuity test uses a tiny current, and a contact that is eroded but still touching can pass that test while failing completely under the hundreds of amps a cart actually draws. If your switch is the high current type and the continuity matrix looks acceptable but the symptom persists, the meaningful test is a voltage drop measurement under real load.
The principle is that a good contact drops almost no voltage across itself, while a resistive one drops a measurable amount, and that difference only appears when current is flowing. With the cart reassembled and safe, the drive wheels raised and the cart supported securely, measure directly across the switch from its input terminal to its output terminal while the cart is driving under load.
A sound contact shows a very small drop. A significantly larger drop across the switch than across an equivalent healthy connection elsewhere identifies resistance inside it, and that resistance is what turns into heat, which is what eventually destroys the switch. Comparing the failing direction against the working direction on the same switch is the most useful comparison available, since both share everything else. The general method is set out in the voltage drop testing guide.
Brand Notes and Model Links
Where a cart will not go in either direction, the switch is usually not the whole story, and the model-specific write-ups work through the full chain for the most common platforms: Club Car DS, Club Car Precedent and Yamaha G29. Where only one direction has been lost, start with the switch itself using the matrix above.
Single direction faults on specific models are also covered directly, including the E-Z-GO TXT that will not go forward and the Yamaha G16 that will not go forward.
When ordering a replacement, match by serial number and the model’s parts catalog rather than by appearance. Switch bodies that look identical can differ in contact rating, terminal arrangement and detent action, and a switch rated for a signal circuit fitted where drive current flows will fail quickly. Photograph the wiring before removal in every case, because terminal markings are not consistent between manufacturers.
Replacing the Switch
Replacement is mechanically simple and the risk is entirely in the wiring. A forward and reverse switch wired incorrectly will drive the cart in the opposite direction to the one selected, which is genuinely dangerous.
Photograph the terminals from several angles before disconnecting anything, then label each wire against the terminal it came from. Transfer wires one at a time from the old switch to the new one rather than removing them all first, which keeps the arrangement self-evident throughout.
Clean and inspect the cable ends while everything is apart. On a high current switch, the terminals should be tightened to the figure the manufacturer specifies rather than by feel, since a loose high current terminal generates heat and will destroy the new switch the same way the old one went.
Before returning the cart to service, raise the drive wheels clear of the ground and confirm that forward selects forward and reverse selects reverse, with the reverse warning sounding where fitted. Confirm the cart is genuinely dead in neutral. Only then put the wheels back down and road test.
A Documented Signal-Switch Pinout
The 2005 Club Car Precedent IQ maintenance manual publishes a complete three-terminal test for its dash rocker. This is a controller input switch, not the large lever assembly that carries motor field current on a series cart. Use the table only after the cart is identified as the documented Precedent IQ arrangement.
| 2005 Precedent IQ terminal | Wire in the manual | Forward position | Neutral position | Reverse position |
|---|---|---|---|---|
| Terminal 2, common | Red | Common feed for the selected input | No output contact selected | Common feed for the selected input |
| Terminal 3, forward input | Blue | Continuity to terminal 2 | No continuity to terminal 2 | No continuity to terminal 2 |
| Terminal 1, reverse input | White | No continuity to terminal 2 | No continuity to terminal 2 | Continuity to terminal 2 |
The manual also provides a controller-tool test: FORWARD INPUT should be on only in forward, and REVERSE INPUT should be on only in reverse. That is useful because it tests the entire path, not just the rocker on a bench. If the rocker passes continuity but the controller monitor does not change, the fault is in the connector, harness or controller input.
A 2020 Precedent manual describes the same operating principle in newer diagnostic language. If the controller sees forward and reverse inputs at the same time, the vehicle will not operate and the reverse buzzer can sound in every selector position. The manual lists corrosion, water inside the switch or a contact failed closed as causes. That symptom is a strong clue for a signal switch, but it is not a substitute for the exact wiring diagram.
Which Carts Use Which Switch Type
A high-current switch reverses current through motor windings. A signal switch tells an electronic controller which direction to command. The outside appearance follows the work: the high-current version needs large studs, copper contacts and battery-cable-size conductors, while a signal switch can use a small rocker and light-gauge harness.
| Documented platform pattern | Switch mechanism | Electrical job | Best first test |
|---|---|---|---|
| Legacy Club Car DS and E-Z-GO TXT series-motor carts with a large lever and heavy cables | Lever and cam contact assembly | Routes motor field current and carries traction current through large contacts. | Isolated continuity matrix, contact inspection and comparative voltage drop under load. |
| 2005 Club Car Precedent IQ | Three-position dash rocker | Sends separate forward and reverse inputs to the electronic controller. | Use the published three-terminal matrix or the controller’s FORWARD INPUT and REVERSE INPUT monitor. |
| 2010 E-Z-GO TXT 48V TCT | Dash direction selector | Provides direction information to the TCT control system. The manual wiring separates the selector, controller and reverse buzzer. | Use the exact TCT wiring diagram and controller input diagnosis. Do not use a high-current contact test on the harness. |
| E-Z-GO RXV | Rotary key and direction selection functions in the low-current control system | Commands an electronic AC controller rather than reversing motor phase cables mechanically. | Read controller direction status and test the named switch contacts from the RXV service procedure. |
| Yamaha G29 or Drive electric | Dash direction switch with a separate controller and reverse warning circuit | Signals the motor control unit. | Follow the YDRE service diagram selected by full model code. Public owner material does not provide one universal terminal map. |
Some gas carts use a lever and cable to move a mechanical transmission selector. That linkage can be stiff, misadjusted or blocked even though its small safety and reverse-warning switches are electrically sound. On an electronic rocker there is no shift cable to adjust. On a high-current lever there are both mechanical contact alignment and electrical contact condition to inspect. Identifying the mechanism prevents replacing a rocker for a transmission cable problem or opening a live high-current assembly as though it were a signal switch.
Use the Reverse Buzzer as a Circuit Clue
The reverse buzzer is normally a warning branch, not the device that reverses the motor. In the 2005 Precedent IQ manual, the buzzer has pink and orange/white wires. The test checks pack voltage on the pink feed, then checks the switched side. That means a working buzzer in reverse proves that at least part of the run power and reverse-command path is alive. It does not prove that the controller, solenoid or motor can deliver drive.
The 2020 Precedent behavior is even more diagnostic. A buzzer sounding in forward, neutral and reverse can mean the controller sees both direction inputs. A silent buzzer with a correct reverse input points toward the buzzer feed, buzzer ground or buzzer itself. A silent buzzer together with no reverse input points back toward the selector, its connector or the shared control feed.
On a high-current lever cart, the reverse-warning microswitch can be mounted on the selector assembly but remain electrically separate from the copper power contacts. The cart can reverse with no warning if only that microswitch or buzzer branch fails. It can also sound the warning and still fail to move if the main contacts are burned. Test the warning switch and main switch as separate circuits.
Why There Is No Universal Voltage-Drop Limit
No manufacturer-published contact voltage-drop limit was found that applies across the common golf cart forward and reverse switch families. The current, contact construction, cable size and test point differ too much. Publishing one number would create false failures on a signal rocker and false passes on a high-current contact assembly.
Keep the comparative method already described on this page. Measure across the same pair of high-current switch contacts while the cart pulls the same load in the working and failing directions. A noticeably larger drop in the failing direction, paired with heat or discolored terminals, isolates resistance inside that contact path. Also measure the adjacent cable and crimp separately. A bad lug can produce the same symptom while the switch remains sound.
Do not perform this live comparison on an unsupported cart, with wheels on the ground or with exposed conductors that the probes can bridge. If one direction does not work at all, a controlled motor-load test may require a qualified technician. An ohmmeter test remains the safe starting point after the pack is isolated and the controller capacitors have discharged.
Establish first whether your switch carries drive current or only signals the controller, because that single fact changes the whole diagnosis and the cable gauge at the switch tells you within seconds. If the cart drives in one direction and not the other, everything shared by both directions has already proved itself, which puts the switch at the top of the list. Rule out the linkage and the terminal connections, then run a full continuity matrix across every terminal pair in forward, neutral and reverse and read the pattern rather than any single reading. On a high current switch that passes continuity but still misbehaves, measure voltage drop across it under load, since an eroded contact can pass a meter test and still fail at hundreds of amps. Match any replacement by serial number, and confirm direction with the wheels raised before driving.
Frequently Asked Questions
How do I know if my forward reverse switch is bad?
The clearest sign is losing one direction while the other still works normally. Everything shared by both directions has effectively proved itself at that point, which leaves the switch as the prime suspect. Confirm it with a continuity matrix across every terminal pair in forward, neutral and reverse rather than by checking a single pair.
Why does my cart go forward but not reverse?
Usually one contact set inside the switch has eroded or opened while the others remain serviceable. The switch is several switches in one housing operating together, so it fails partially rather than completely. Less commonly the fault is a terminal connection at the switch or, on carts where the switch only signals the controller, the controller itself.
Can I test the switch without removing it?
Yes, provided you disconnect the pack and remove the wires from the switch terminals so nothing else sits in parallel with the meter. The continuity matrix works with the switch still mounted. Only a voltage drop test needs the cart reassembled and running, with the drive wheels raised and supported.
Does the forward reverse switch carry the motor current?
It depends on the cart. On many older and simpler models it sits in the main power path and carries full drive current, which is why its contacts erode. On carts with modern controllers it usually carries only a small signal telling the controller which direction was selected. Heavy cables mean the first type, thin harness wires the second.
Are forward reverse switches interchangeable between models?
Often not. Contact ratings, terminal arrangements and detent action vary between manufacturers, models and production years, and a switch intended for a signal circuit will fail quickly if fitted where drive current flows. Order by serial number and the parts catalog, and photograph the existing wiring before removing anything.