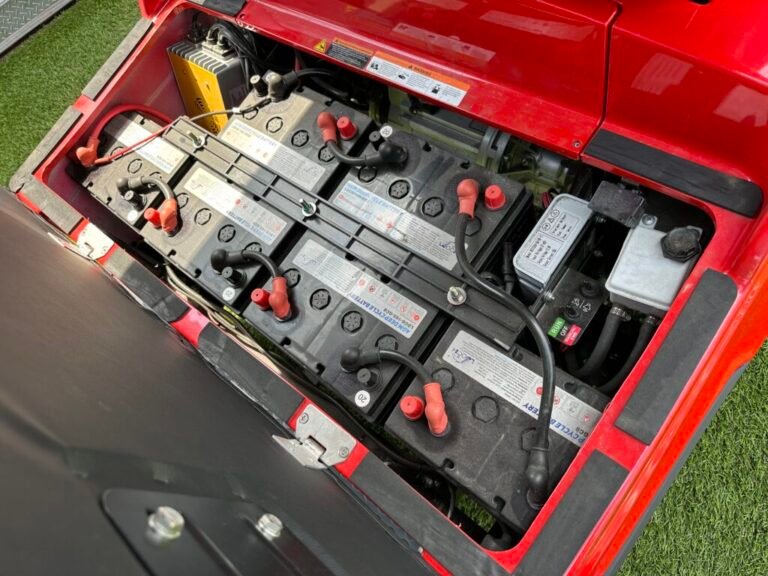
How to Wire a 48V Golf Cart: Battery & System Wiring Guide
A 48V cart is just batteries in series feeding the solenoid and controller. Here is the exact wiring layout for 6V, 8V, and 12V configurations, plus the safety order that matters.
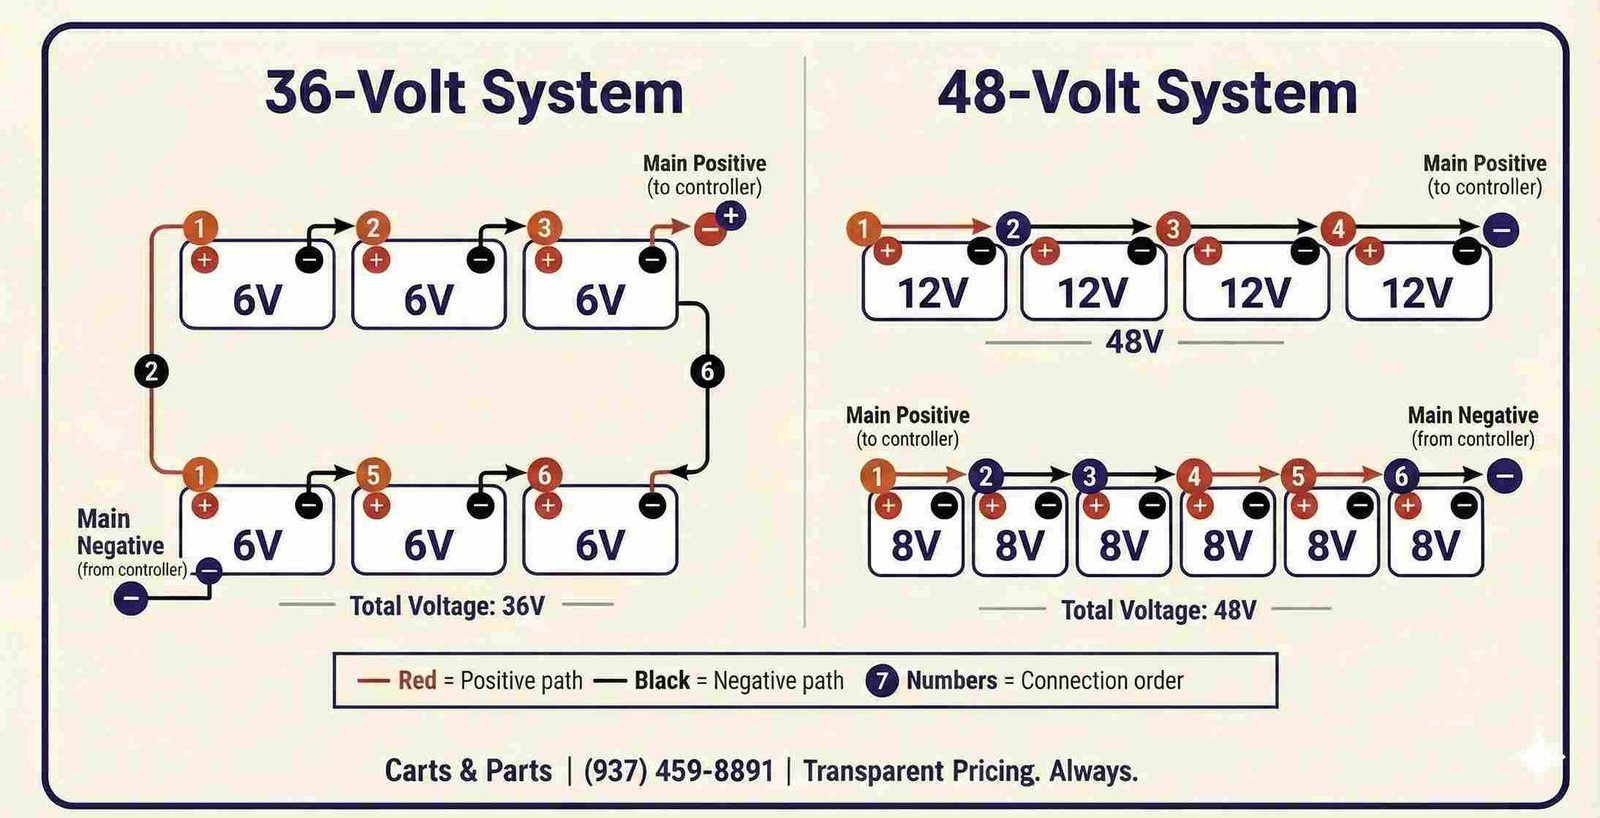
- Eight 6V, six 8V, or four 12V batteries wired in series all make 48V nominal, the choice depends on capacity, tray space, and budget.
- A rested 48V flooded pack should read about 50.93V full, per Trojan’s maintenance table, a sanity check before powering on.
- Main leads run through the solenoid to controller B+, and to controller B- or the diagram-specified negative point, never copy landing points across platforms.
- Disconnect the main negative first, reconnect it last, this rule is repeated in both Club Car and Yamaha factory manuals.
Wiring a 48V system is the same series principle as any cart, you just chain the right batteries to reach 48 volts. Knowing how to wire a 48V golf cart means understanding the battery configuration, the series links, and how the main leads connect to the solenoid and controller.
01. Step 1: Choose Your 48V Battery Configuration
First decide the battery layout: eight 6V, six 8V, or four 12V batteries, each wired in series makes 48V nominal. More batteries, usually 6V or 8V deep-cycle units, often mean better golf-cart cycle life than four 12V batteries, but the exact answer depends on capacity, tray space, charger type, and budget. See the trade-offs in running 4 12V batteries in a 48V cart.
For flooded lead-acid voltage checks, use a battery maker’s state-of-charge chart rather than guessing. Trojan’s maintenance table puts a rested 48V flooded pack at about 50.93V when fully charged, so the “about 50 to 51V” verification step below is a rested-pack sanity check, not a wiring substitute.
02. Step 2: Chain the Batteries in Series
Link positive-to-negative down the line: battery 1 positive to battery 2 negative, and so on, until you have one free positive and one free negative at the ends. Those add up to 48V. Use proper jumper cables and clean, torqued connections, following our battery wiring guide.
03. Step 3: Wire the Main Leads
Run the main positive lead from the free positive terminal toward the solenoid or main contactor, then from the solenoid/contactor output to the controller B+ terminal. Connect the main negative from the free negative terminal to the controller B- or battery-negative point shown in your model’s diagram. Use cable rated for the current, see what wire to use. Keep these high-current connections clean and tight.
Do not copy the main-lead landing points from a different platform. The E-Z-GO RXV service manual, for example, shows battery-tray wiring with charger-receptacle leads, a BL+ red wire from the solenoid, and a BL- black wire from the controller. That is not the same layout as an older series cart. Follow the diagram for your exact model year.
04. Step 4: Test the Pack Before Powering On
- Double-check polarity against the wiring diagram for your exact cart.
- Measure the pack end to end. A rested flooded 48V pack near 50 to 51V confirms the batteries are in a full 48V series path. A much lower reading means the pack is discharged, wired wrong, or has a weak battery.
- Verify controller B+ and B- at the controller before selecting Run.
- Reconnect the main negative last.
- Set the switch to Run and test at low speed first.
For accessories, add a reducer rather than tapping the pack, see wiring lights.
05. Platform Quirks: Club Car, E-Z-GO, and Yamaha
The series principle never changes, but where the wires go depends on your cart. Club Car Precedent and DS generations are especially easy to misread because charging systems changed over time. The 2009-2011 Precedent service manual has separate IQ wiring diagrams, tow/run switch service, solenoid testing, charger receptacle service, onboard computer sections, and a specific onboard-computer gray-wire test. Later ERIC-charger carts are different again. If you swap to lithium or rewire a Club Car, identify the charging generation before bypassing, deleting, or moving OBC-related wiring.
An E-Z-GO RXV uses an AC controller layout that is not the same as older TXT or series carts. The RXV service manual shows main wiring diagrams with the solenoid coil, charger receptacle, tow switch, motor sensor, and controller wiring, plus battery-tray leads labeled from the charger receptacle, solenoid, controller, and harness. Use an RXV diagram, not a generic E-Z-GO diagram.
Yamaha Drive and Drive2 48V carts also deserve model-specific care. Yamaha’s DR2E17 owner manual identifies the cart as a 48 Volt AC PTV, shows the tow switch and DC charger receptacle, and states that during battery installation the negative cable to the motor controller should be removed first and installed last. It also gives an 80 to 89 in-lb torque range for the battery wire leads. That is stronger guidance than guessing by feel.
06. Safety Rules That Prevent Sparks and Injury
A 48V pack can push enormous current through a dropped wrench, so treat it with respect. Remove all rings, watches, and metal bracelets before you start. Disconnect the main negative first when taking the system apart, and reconnect it last when reassembling. Yamaha gives the same negative-cable-first and last rule for its Drive2 battery work because a spark at the battery can cause fire or explosion. Never lay a metal tool across two terminals of different potential. Charge and work in a ventilated area, because lead-acid batteries vent hydrogen. Keep a box of baking soda nearby to neutralize any acid spill, and wear eye protection the entire time. If a connection ever sparks or a cable feels warm during use, stop and investigate before driving.
Before touching a terminal, gather the right gear: an insulated wrench set that fits your battery post hardware, a wire brush for cleaning corrosion, a digital multimeter, a torque wrench, and dielectric grease or an anti-corrosion spray. For the jumper links between batteries and the main leads, use fine-stranded copper battery or welding cable, buy pre-made cables with proper crimped-and-sealed lugs unless you own a hydraulic crimper, since a poor homemade crimp is a fire risk on a high-current pack.
07. Wiring Differences When Going Lithium
If your 48V build uses a single lithium block instead of a bank of lead-acid batteries, the wiring gets simpler on the battery side but adds a few new steps. Instead of chaining eight or six batteries in series, you connect one main positive and one main negative from the lithium pack to the same solenoid/contactor and controller terminals shown in the conversion kit or vehicle diagram. Many lithium packs include a battery-management system with protections for overcharge, overdischarge, overcurrent, short circuit, and temperature. Some kits also add communication, wake, charger, or meter leads, so follow the lithium kit manual instead of assuming every pack is just two big cables.
Club Car OBC-era carts are the classic place where lithium conversions go wrong. The service manual proves those generations have onboard-computer, charger-receptacle, gray-wire, and solenoid circuits, but it does not make one bypass method universal. Use the battery kit instructions and the Club Car wiring diagram for your serial range. The high-current path still needs correct polarity, correct cable gauge, and a meter check before power-up, because a lithium pack can dump current far faster than lead-acid if you reverse it.
To wire a 48V golf cart: chain batteries in series (8x6V, 6x8V, or 4x12V) to make 48V, run the main positive through the solenoid/contactor to the controller B+, and the main negative to B- or the diagram-specified negative point. Negative off first, on last; verify about 50 to 51V on a rested full flooded pack before powering up.
Frequently Asked Questions
How do you wire a 48V golf cart?
Wire the batteries in series to total 48 volts (eight 6V, six 8V, or four 12V), connecting each positive to the next negative. Run the main positive lead through the solenoid to the controller B+ and the main negative to B-, then verify about 50V before powering on.
What is the correct battery setup for a 48V golf cart?
A 48V cart uses eight 6-volt, six 8-volt, or four 12-volt batteries wired in series. More 6V batteries generally give longer range, while four 12V batteries offer the simplest wiring with fewer connections.
What gauge wire should I use for 48V golf cart batteries?
4 AWG is the common choice for jumper links and main leads on a 48V cart and is the safe default for most builds. 6 AWG shows up on some stock, low-current fleet carts and short runs, while heavy-duty setups (big lift, oversized tires, a high-amp controller) are usually run in 2 AWG. Use fine-stranded copper battery or welding cable rather than solid automotive wire, and buy pre-made cables with properly crimped and sealed lugs unless you own a hydraulic crimper, because a poor crimp on a high-current pack is a fire risk. See our golf cart battery cable size guide for the full AWG chart, or run your own numbers in the wire gauge and voltage drop calculator.
Is it better to use 6V, 8V, or 12V batteries in a 48V golf cart?
All three reach 48V, but they trade off differently. Eight 6V batteries usually give the best cycle life and range per charge, which is why fleet carts use them. Six 8V batteries are the middle ground and are common in factory 48V carts because they balance capacity against tray space and weight. Four 12V batteries are the cheapest and simplest to wire with the fewest connections, but generally give the least range and shortest life in deep-cycle service. Your tray size, charger profile, and budget decide it more than the voltage itself.
Which battery terminal do I disconnect first on a 48V cart?
Disconnect the main negative first and reconnect it last. Both Club Car and Yamaha factory manuals repeat this rule, because with the negative removed a dropped wrench touching the frame cannot complete a circuit. Yamaha also publishes an 80 to 89 in-lb torque range for the battery wire leads on the Drive2, and states the negative cable to the motor controller should be removed first and installed last.