Replacing EZGO RXV Front Suspension A-Arm Bushings
Worn A-arm bushings are the usual source of front-end clunk and uneven tire wear on the RXV.
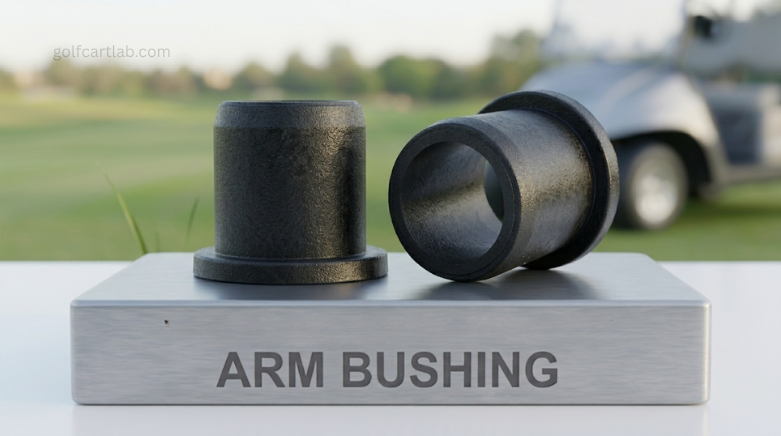
If your cart is darting left and right on the road, bad bushings will make alignment impossible. Review our tie-rod alignment procedures in the Diagnostics Lab so you can properly track the cart after you finish this rebuild.
01 : The Physics of RXV Bushing Failure
The ezgo rxv front suspension is unique. It relies on a heavy-duty coil-over shock (strut) mounted to a lower control arm (A-arm). The A-arm is the pivot point for the entire front corner of the cart. It attaches to the steel frame using a long through-bolt, a hollow metal sleeve, and two polyurethane bushings.
Over years of use, dirt, water, and the constant friction of the metal sleeve pivoting up and down physically grind the polyurethane bushings into dust. Once the rubber is gone, the metal A-arm bangs directly against the metal frame (the clunking noise). Because there is now a gap where the bushing used to be, the bottom of the tire pushes outward, causing severe negative camber and destroying the inner tread of your tires.
02 : The Lab Kit: Tools Required
To pull the A-arms off your EZGO RXV without fighting seized hardware, you need the right setup.
-
Jack & Heavy-Duty Jack Stands: Absolutely critical. You will be yanking on the suspension; the cart must be totally secure.
-
Metric Socket Set (15mm & 17mm): EZGO RXV suspension hardware is heavily metric.
-
Marine-Grade Grease & Rubber Mallet: Required to smoothly press the new polyurethane bushings into the A-arm housing.
03 : The Teardown Protocol
You must completely remove the A-arm from the chassis to access the internal bushing sleeves.
- Elevate and Isolate: Chock the rear wheels. Jack up the front of the RXV by the main frame rail (behind the front wheels) and place it on jack stands. Remove the front tires.
- Disconnect the Strut: Use your socket wrench to remove the lower shock mounting bolt where the bottom of the coil-over strut attaches to the A-arm. Push the shock upward and out of the way.
- Detach the Spindle: Remove the bolt connecting the outer edge of the A-arm to the kingpin/spindle assembly.
- Drop the A-Arm: Locate the long through-bolt securing the inner A-arm to the cart’s main frame. Unbolt it, slide the bolt out, and pull the A-arm completely off the cart.
04 : Extraction and Pressing
With the A-arm on your workbench, you will immediately see the damage. The old metal sleeve inside the bushing joint is likely rusted and seized.
Use a punch and a hammer to knock the old steel sleeve out of the A-arm. Once the sleeve is out, pry the two old rubber bushings out of the circular housing. Thoroughly clean the inside of the A-arm housing with a wire brush or brake cleaner to remove built-up rust.
Take your new polyurethane bushings and coat the inside and outside heavily with marine-grade waterproof grease. Push one bushing into each side of the A-arm housing (a rubber mallet helps here). Finally, coat the new metal sleeve in grease and slide it straight through the center of the two new bushings.
05 : Reassembly & Alignment Warning
Reinstall the A-arm in the reverse order. Slide it back into the frame bracket, insert the long through-bolt, attach the outer spindle, and bolt the bottom of the strut back into place. Torque all suspension bolts firmly.
Crucial Warning: Replacing the A-arm bushings drastically changes the physical position of your front wheels. Before you drive at top speed, you must perform a toe alignment. Replacing these bushings usually causes the front tires to “Toe-In” aggressively. Adjust your steering tie rods until you have a mild 1/8-inch Toe-In gap to prevent the cart from darting across the road.
Don’t want to deal with seized bolts and dirty grease? Browse professionally rebuilt, street-ready EZGO RXVs in our Guides.
RXV front A-arm bushings are a common wear point on 2008-newer carts because the front suspension carries more braking load than a simple TXT when regenerative braking is active. A clunk during braking or a wandering feel over rough pavement often comes from the bushing sleeve moving inside the arm, not from the rack itself. Inspect the rear bushing on each lower arm closely; it can look acceptable until you pry the arm forward and see the sleeve shift. If the cart has 22-inch tires or a rear seat, the extra unsprung weight makes the problem show up earlier. Use new sleeves and hardware with the bushings rather than pressing rubber into a rusty sleeve. After replacement, set toe with the cart loaded as normally driven, because RXV front geometry changes enough under weight to affect tire wear.
06 : Lab Summary
Rebuilding your ezgo rxv front suspension is a highly satisfying fix. By tearing down the MacPherson-style A-arm, extracting the rusted sleeves, and pressing in fresh, greased polyurethane bushings, you eliminate front-end clunking, fix your negative camber, and save your front tires from premature baldness.
For official torque specifications regarding your exact model year, consult the EZGO Owner’s Manual Portal.
07 : RXV bushing and hardware reference
The RXV service parts manual identifies A-arm assembly 608089, A-arm bushing 601340, four required, and carrier tube 602085. Confirm by model/year and serial before ordering. The repair manual tells the technician to retain and inspect the sleeve for wear or pitting, and to apply anti-seize only to urethane bushing contact surfaces.
| Item | Published reference | Torque or method |
|---|---|---|
| A-arm assembly | 608089, confirm by model/year | No separate A-arm pivot torque in the accessible manual section. |
| A-arm bushing | 601340, four required | Inspect and retain sleeve; anti-seize contact surfaces only. |
| Carrier tube | 602085 | Replace if worn or pitted with the bushing system. |
| Steering rod end to spindle | RXV steering procedure | 20 to 25 ft-lb for the identified item. |
| Rod-end jam nut | RXV steering procedure | 22 to 27 ft-lb for the identified items. |
No bushing OD, ID, or press-cup size was published in the sources used. Measure the removed bushing’s OD, the sleeve ID, and the bore with calipers. Choose a press cup that bears only on the shell, never through urethane or the sleeve. Check toe after reassembly.
FAQ
What causes RXV front-end clunk?
Check A-arm bushings and sleeves, hardware, rod ends, kingpins, strut mounts, and steering rack play one connection at a time.
Bushing or ball-joint problem?
Split urethane or sleeve side play points to the pivot. Vertical movement at a tapered rod-end or ball joint points to that joint. Test both.
What tools are needed?
Use safe lifting equipment, hand tools, torque wrench, calipers, and a suitable press or bushing tool sized from the removed components.
Do I need an alignment after bushings?
Check alignment afterward. Record old rod-end length, then inspect toe and steering-wheel center after the suspension settles.