
Club Car Bypass OBC (On-Board Computer)
If you are upgrading to a modern smart charger or a lithium battery pack, bypassing the OBC is a mandatory step. Here are the five practical ways to do it and restore a clean 48V charging circuit.
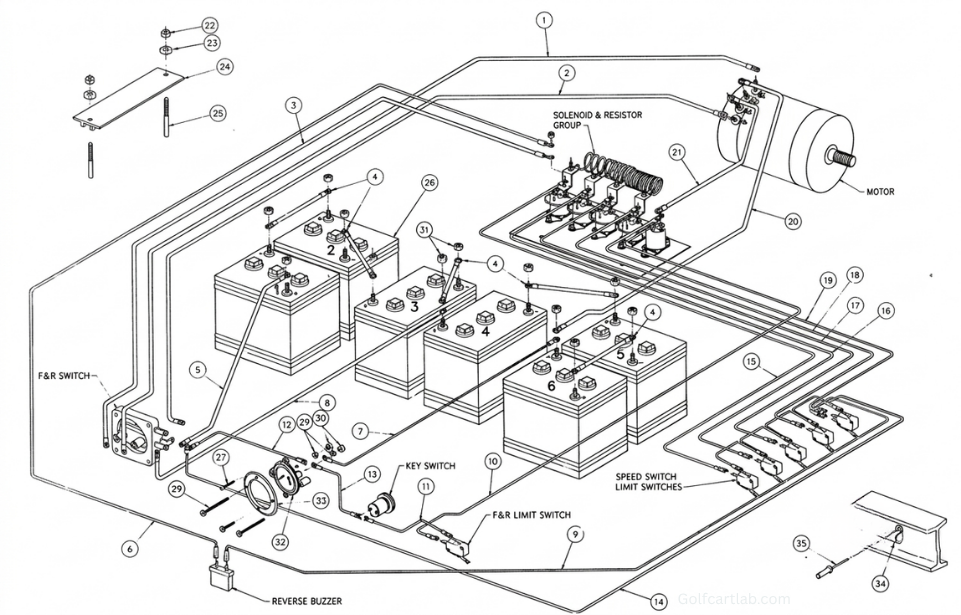
- The factory OBC watches pack negative through an internal shunt and can block a modern smart charger from ever starting.
- The negative receptacle bypass and the charger interlock disable are the two steps that actually matter; skip the interlock and the cart won’t run.
- A full OBC delete is optional. Many owners leave the box mounted and just bypass the failed charge-control path.
- Slug and page structure are unchanged; this is a content and layout update only, not a URL change.
If you are upgrading to a modern smart charger or a lithium battery pack, performing a Club Car bypass OBC is a mandatory step in your electrical telemetry upgrade. The legacy On-Board Computer was designed to manage “dumb” chargers, but its internal interlock and charging logic will block a smart charger from functioning. This guide details five practical ways to bypass the OBC and restore a clean 48V charging circuit.
Before cutting any wires, verify that your new charger is specifically designed for a non-OBC setup. Some chargers still rely on the OBC’s data handshake, which can cause a bypass failure if the telemetry doesn’t match. Review your charger’s compatibility before beginning the delete, and browse the full repair guide library if you need to verify a related diagnostic first.
The Physics of the OBC Shunt
Before you cut anything, it helps to understand what the box actually does. That tells you which wires matter and which ones you can ignore.
Every amp that enters or leaves your pack passes through a shunt inside the OBC, a low-value resistor of roughly 0.001 ohm. The computer reads the small voltage across that shunt and converts it to current, so 50 amps of charge current shows up as about 50 millivolts. It counts those amp-hours in and out, and that running total drives the charge meter and decides when charging should stop.
The problem is that this design assumes a “dumb” ferroresonant charger, the kind that pushes current until the OBC tells it to stop. A modern smart charger such as a Lester Summit II or Delta-Q QuiQ runs its own charge algorithm and expects to control the entire cycle itself. Put the two together and they work against each other: the OBC tries to gate a charger that will not be gated, and you get a cart that refuses to charge even though both parts test fine on their own.
There is a second failure mode worth knowing about. That shunt carries full pack current through a soldered joint on the OBC board. After a decade of 50-amp cycles those joints crack, and a cracked shunt joint adds resistance to the main negative path. The symptoms are slow charging, heat at the OBC, and pack voltage that sags under load. If the OBC housing is warm to the touch after a charge cycle, that joint is a prime suspect.
| Symptom | Likely cause | How to confirm |
|---|---|---|
| Charger never starts | OBC blocking an incompatible smart charger | Measure DC volts at the receptacle pins with the charger plugged in. Near 0V means no handshake occurred. |
| Charges very slowly | Cracked shunt solder joint adding resistance | Feel the OBC housing after a charge. Warm or hot indicates resistive heating at the joint. |
| Cart will not drive | Interlock stuck in “charger connected” state | Check continuity across the interlock pins. An open circuit holds the cart in no-run. |
| Meter reads wrong | Amp-hour count drifted from actual pack state | Compare the meter reading against a resting pack voltage measurement. |
| Voltage sags hard | High resistance in the negative path through the OBC | Voltage-drop test across the OBC negative path under load. Over 0.3V indicates a problem. |
The Negative Receptacle Bypass
This is the step that actually does the work. In the factory wiring, the heavy black wire from the charge receptacle runs through the OBC before it reaches the pack. You are going to reroute it so it goes straight to the battery negative post instead.
Set aside about 45 minutes. You will need a 1/2 inch wrench for the battery terminals, a 7/16 inch for the receptacle studs, a proper crimper, 10 AWG stranded copper wire, adhesive-lined heat shrink, and a multimeter.
Disconnect the main pack negative first and tape the cable end so it cannot spring back onto the post. A 48V pack will happily dump several hundred amps through a dropped wrench, and that is how tools get welded to battery terminals. Take off rings and watches too.
- Confirm the OBC is actually in the negative path. Set your meter to DC volts, put the black probe on pack negative and the red probe on the receptacle negative stud. On a healthy factory setup you will read close to 0V. Anything above roughly 0.2V means resistance has already built up inside the OBC, which confirms the bypass is worth doing.
- Find the right wire. Look at the back of the charge receptacle for the black 10 AWG wire running toward the OBC. Do not confuse it with the smaller gray sense wire, which is usually 16 or 18 AWG and often has an inline fuse. Cutting the gray one instead is the most common mistake on this job.
- Cut and prepare. Cut the black wire close to the OBC end so you keep as much length as possible on the receptacle side. Strip back about 3/8 inch of insulation. If the copper underneath looks dark or green, cut back further until you reach bright copper. Corroded strands will undo all of this work.
- Run the new path. Crimp a ring terminal sized for your battery post, 3/8 inch on most Club Car packs, onto the receptacle-side wire. If you need to extend it, use 10 AWG minimum and join it with a butt splice, not a twist-and-tape. Route the new run away from anything hot or moving, and secure it every 12 inches or so with zip ties.
- Land it on the post. Bolt the ring terminal directly to the main pack negative post and torque it to roughly 100 inch-pounds. This number matters more than people expect. Loose terminals are the leading cause of melted battery posts, because resistance at the joint turns into heat under a 50-amp charge.
- Seal the joint. Slide adhesive-lined heat shrink over every crimp and shrink it until the adhesive just beads at the edges. Carts live outdoors, and an unsealed crimp will corrode within a season.
- Verify before you move on. Reconnect the pack, plug in the charger, and measure across the new connection. You want under 0.1V drop while charging. If it reads higher, the crimp is not making full contact and you should redo it now rather than chase it later.
Disabling the Charger Interlock
Here is where people get stranded. Club Car carts refuse to drive while they think a charger is connected, and the OBC controls that logic. Bypass the charge path but leave the interlock alone and you end up with a cart that charges perfectly and will not move an inch.
The interlock lives on the 6-pin connector at the OBC. On most 48V DS and Precedent carts the relevant wires are blue and white, though colors do vary by year, so verify with a meter rather than trusting the color alone.
- Locate the 6-pin connector on the OBC and unplug it. Photograph it before you disconnect anything. That photo is worth a lot if you need to reverse the job later.
- Identify the interlock pair. Set your meter to continuity. With the charger unplugged, the interlock circuit should read open at the OBC. Plug the charger in and it closes. That change is how you confirm which two wires you are dealing with.
- Cut on the harness side. Cut the blue and white wires on the cart harness side, leaving enough length at the OBC end that a future owner can undo this. Never cut flush.
- Splice them together. Join the two harness-side wires with a butt splice and crimp properly. This permanently tells the controller that no charger is connected, which restores normal drive logic.
- Test drive at low speed. Reconnect the pack and try the cart in forward and reverse. If it still will not move, you have the wrong pair, so go back to the continuity test rather than cutting anything else.
| Wire | Typical gauge | Function | What to do with it |
|---|---|---|---|
| Black (receptacle) | 10 AWG | Main negative charge path | Reroute directly to pack negative post |
| Blue (6-pin) | 16 AWG | Interlock sense, charger present | Splice to the white wire on the harness side |
| White (6-pin) | 16 AWG | Interlock return | Splice to the blue wire on the harness side |
| Gray (fused) | 16 to 18 AWG | Charger wake or sense signal | Depends on charger. See the section below. |
| Red (OBC power) | 16 AWG | Supplies power to the OBC board | Cap and insulate if doing a full delete |
Gray Wire Fuse and Sense Logic
The gray wire is the piece that causes the most confusion, because what you do with it depends entirely on which charger you bought.
On many Club Car DS models a small gray wire with an inline fuse, usually 5 or 7.5 amp, runs from the receptacle to the OBC. Some smart chargers need a positive signal on that line before they will wake up and begin a cycle. Others ignore it completely and start on their own once they detect pack voltage.
Check the fuse before assuming anything else is wrong. A blown gray-wire fuse produces exactly the same symptom as a dead OBC: nothing happens when you plug in. It is a two-minute check that saves people from replacing parts they did not need to replace.
| Charger type | Needs sense signal? | Gray wire handling |
|---|---|---|
| Lester Summit II | No | Cap and insulate. The charger detects pack voltage on its own. |
| Delta-Q QuiQ | No | Cap and insulate. Runs its own algorithm start to finish. |
| Original PowerDrive | Yes | Leave intact. This charger depends on OBC handshake logic. |
| Generic lithium charger | Varies | Check the manual. If a wake signal is required, tap to a fused 48V positive. |
| Lithium pack with internal BMS | No | Cap and insulate. The BMS handles all charge control. |
The Full OBC Removal (OBC Delete)
Once the electrical bypass is finished and tested, the box itself is just weight. Removing it is optional, and there is no performance gain in doing so, but it simplifies the wiring loom considerably and makes future troubleshooting far easier.
My honest advice: leave the OBC physically mounted the first time through. Bypassing it electrically while the box stays in place keeps the job reversible, and if something behaves oddly a week later you still have the original wiring to compare against. Pull the box out on a second pass once you are confident everything works.
- Confirm several full charge cycles first. Do not remove anything until the cart has charged and driven normally at least three times. Problems from a partial bypass tend to surface on the second or third cycle, not the first.
- Disconnect pack negative again before touching any hardware. Same rule as before, no exceptions.
- Cap every abandoned wire individually. Heat shrink each one separately rather than bundling them. Two bare ends touching inside a taped bundle is a short waiting to happen.
- Unbolt and remove the box, usually two 3/8 inch bolts on the mounting bracket. Keep the hardware in case a future owner wants to restore the original setup.
- Label the cart. Put a small tag near the receptacle reading “OBC bypassed, smart charger required.” This one costs nothing and prevents the next owner from plugging in an old PowerDrive and wondering why nothing works.
A half-finished bypass is worse than no bypass. If you reroute the negative path but skip the interlock, the cart will not drive. If you disable the interlock but leave the charge path through a failing OBC, you keep the original slow-charging fault. Finish both steps in the same session.
Lab Summary
A successful Club Car bypass OBC transition restores the vehicle’s charging logic to a modern standard. By rerouting the negative receptacle lead and jumping the interlock wires, it enables the use of smart chargers and lithium packs that would otherwise be blocked by the legacy computer. Maintaining clean, direct power telemetry is the cleanest way to keep a Club Car DS or Precedent reliable for another decade.
For official OBC wiring schematics and charger interlock diagrams, visit the Club Car Support Portal or cross-reference electrical vehicle safety standards at the NHTSA LSV Safety Portal.
Bolt the black receptacle negative wire directly to the battery pack negative. Splice the blue and white wires together on the OBC harness to disable the interlock. This procedure lets a new smart charger take full control of the 48V telemetry without interference from the legacy computer.
Should You Bypass It At All?
The OBC bypass gets recommended freely on forums, but it is worth being clear about what you gain and what you give up before cutting anything. The on-board computer on a Club Car DS or Precedent counts amp-hours out of the pack and meters the charge back in, and it also gates when the charger is allowed to run. Bypassing it hands both of those jobs to your charger.
- Good reason to bypass: you have fitted a modern smart charger or a lithium pack with its own battery management system, and the OBC is now duplicating or fighting logic the charger already handles better.
- Good reason to bypass: the OBC has genuinely failed and will not initiate charging, and a replacement unit costs more than the charger you intend to fit.
- Poor reason to bypass: the cart will not charge and you have not yet diagnosed why. A dirty receptacle, a blown gray-wire fuse, a bad charger cord, or a pack too far discharged to trigger the handshake all produce the same symptom and none of them are fixed by a bypass.
- Poor reason to bypass: you want faster charging. The OBC is not usually the limiting factor, and removing it will not increase your charger output.
The honest summary is that a bypass is a sensible modification when you have deliberately replaced the OBC function with something better, and a way of hiding a fault when you have not. Diagnose first, then decide.
Parts note: For a 48V Club Car with the 3-pin charge receptacle, the TORO720 15A multi-chemistry smart charger we stock plugs straight in, no adapter needed. View charger
What Changes After The Bypass
Once the OBC is out of the loop, a few behaviors change and it helps to expect them rather than be surprised later. The state-of-charge display driven by OBC counting may read incorrectly or stop updating, since nothing is tracking amp-hours any more. Your charger becomes solely responsible for deciding when to stop, which is fine with a quality smart charger and a real problem with a cheap unregulated one.
Charge termination is the part that matters most. A modern charger profiled for your battery chemistry will taper and stop on its own. If you bypass the OBC and leave an old ferroresonant charger in place with no reliable termination, you can overcharge and cook a lead-acid pack. Match the charger to the pack before you rely on it as the only control in the system.
Frequently Asked Questions
Do I still need the OBC box after bypassing it?
No, not for charging control when a compatible smart charger is doing the charging logic. The remaining question is wiring: the negative receptacle path and any charger interlock or gray-wire sense circuit must be handled correctly so the cart and charger both behave normally.
Will bypassing the OBC void my charger warranty?
It can if the charger maker requires a specific wiring setup or if the bypass is done incorrectly. Use the charger manufacturer instructions, match the charger to the pack voltage and chemistry, and keep the work reversible if warranty coverage matters.
What happens if I only do half the bypass?
A partial bypass can leave the cart with confusing symptoms: the charger may not start, the cart may think the charger is still plugged in, or the negative charge path may still run through a failed OBC circuit. Finish the negative charge path and interlock logic as a matched repair, not as separate guesses.
Can I bypass the OBC without removing the whole box?
Yes, many repairs leave the OBC physically mounted while bypassing the failed charge-control path. That is different from a full OBC delete. The safe choice depends on the cart year, wiring harness, charger style, and whether the interlock circuit still needs to be disabled.
Will bypassing the OBC hurt my battery life?
Not by itself, provided the charger you are relying on terminates properly for your battery chemistry. The risk comes from removing the OBC while leaving a charger that has no reliable end-of-charge behavior, because nothing is then deciding when to stop. With a quality smart charger correctly profiled for your pack, battery life is generally unaffected and can improve if the OBC was cutting charge cycles short.
How do I know whether my OBC has actually failed?
Test before you conclude. Check the gray-wire fuse, confirm the receptacle pins are clean and making contact, and verify the charger itself works on another cart or a bench supply. A pack that has fallen below the voltage the charger needs to see before it will start also mimics OBC failure exactly. Only after those check out is OBC failure the likely answer.
Can I reverse the bypass later?
If you carried out a wiring bypass and kept the original OBC and harness intact, yes, and it is worth keeping the parts in a labeled bag for that reason. A full OBC delete where the unit is removed and the harness modified is harder to reverse, so choose the less permanent option if you are still evaluating the change or may want to sell the cart to someone who expects the original setup.
Does this apply to a Club Car Precedent as well as a DS?
The general principle is the same across both, but the wiring specifics, receptacle layout, and OBC location differ between generations, and Precedent models changed again over their production run. Confirm your year and model before following any wiring step, since the color codes and pin positions are not interchangeable between platforms.
