Navitas Controller Upgrades: Club Car Fitment Guide
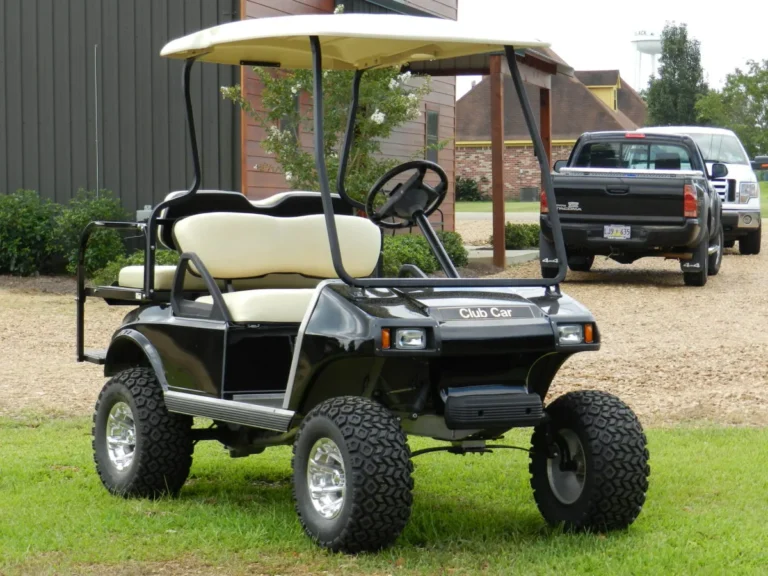
- Club Car DS spans several electrical generations, so the body shape cannot establish fitment.
- Precedent is a newer chassis family than DS and commonly uses 48V IQ or later electrical systems, but model name still does not prove controller type.
- TSX3.0 controls a compatible DC motor; TAC2 controls an AC induction motor and therefore belongs with a matched AC motor, encoder, phase wiring, and calibration.
- Installation starts with pack isolation and a verified schematic.
Club Car DS, Precedent, Onward, and Tempo names span different electrical systems. Confirm the serial prefix, battery voltage, throttle type, controller label, motor, and Navitas part number before ordering.
Club Car DS: The Classic Chassis
Club Car DS spans several electrical generations, so the body shape cannot establish fitment. Current Navitas selectors list TAC2 440A/4kW and 600A/4kW packages for compatible 48V IQ/APPS-style DS applications. Earlier 36V series, V-Glide, Regen, and other throttle systems require separate identification and must not inherit an IQ harness.
| Club Car family | Current Navitas path | Verify before ordering |
|---|---|---|
| DS | Selected TAC2 440A or 600A, 4kW packages for supported 48V IQ/APPS carts | Voltage, series or SepEx drive, throttle, controller label, spline |
| Precedent | TAC2 440A/4kW, 600A/4kW, and selected 600A/5kW; TSX DC options | IQ/APPS, Excel or other OEM drive, battery, motor |
| Onward | Platform-specific DC-to-AC or controller paths on current selector | Factory DC versus factory AC drive and exact model |
| Tempo | Platform-specific TAC2 and TSX paths | Navitas notes TSX incompatibility with Club Car Regen 2 |
The public selector does not provide one reliable start-and-end year table for every electrical variation. Serial and installed hardware are safer than an invented range.
Photograph the old controller label, motor label, throttle connector, main harness plugs, and battery layout. Count motor terminals and spline teeth only with the pack safely isolated and the procedure understood. Those details distinguish an electrical conversion from a cosmetic body model and give the supplier enough evidence to confirm a part number in writing.
Parts note: For a 48V DS with the IQ system (Curtis 1510), this is the TAC2 AC kit we stock. On a DS pick a 4kW option, since the 5kW motor is too long for the DS IQ frame. View kit
Club Car Precedent: The Modern Standard
Precedent is a newer chassis family than DS and commonly uses 48V IQ or later electrical systems, but model name still does not prove controller type. The mounting plate, harness, throttle sensor, and motor package differ from DS. Current Precedent listings include 10-tooth 4kW motor packages and selected 5kW choices, while exact part numbers define whether DS, Onward, or Tempo is also supported.
Find the Club Car serial label under the passenger-side dash or glovebox area on common modern carts, then use Club Car’s official model and serial-prefix lookup. Confirm against the controller and motor labels because transplanted parts can make serial-only ordering unreliable.
The prefix identifies the model family in Club Car’s lookup, while the following production characters help establish year and build sequence on supported formats. Use the official lookup instead of decoding from memory. If the label is missing, Club Car manuals, controller part numbers, throttle hardware, and chassis details must be reconciled before any kit is ordered.
Starting from a slow cart rather than a part number? Our Club Car DS speed upgrade guide and Club Car Precedent speed upgrade guide begin with the checks that rule out a fault, then match kits to the controller label and to the motors each frame can take.
Parts note: For a 48V Precedent with the IQ or Excel system (Curtis 1510 or 1515), this is the Navitas TSX 3.0 kit we stock. It keeps your DC motor, with the harness and On-The-Fly programmer in the box. View kit
Choosing the Hardware: TSX3.0 vs. TAC2
TSX3.0 controls a compatible DC motor; TAC2 controls an AC induction motor and therefore belongs with a matched AC motor, encoder, phase wiring, and calibration. That is the central decision. A TSX upgrade can improve a sound DC cart with less mechanical change. TAC2 provides brushless operation, a wide power band, and controlled regen at greater cost and installation complexity. To choose between them for your Club Car, the AC conversion kit finder asks about your load and hills and shows the kit that fits.
Current ratings are not performance promises. Battery BMS or lead-acid sag, cable gauge, contactor, fuse, motor temperature, tire diameter, gearing, load, and speed settings can become the limit first. Use the guide library to diagnose the existing system before choosing hardware. Then check your Club Car controller compatibility: the finder lists what fits a DS, Precedent, Tempo or Onward by serial number or controller label.
A 600A controller should be programmed around the continuous and peak capability of the complete pack. A lithium BMS can disconnect on overcurrent, while an aged flooded pack can sag enough to trigger undervoltage. Long hills are a continuous thermal problem even when a short launch feels strong. Match settings to the actual route and load.
Installation & The On-The-Fly Programmer
Installation starts with pack isolation and a verified schematic. Confirm Navitas part number, mount, harness, throttle input, motor spline, phase order, encoder, contactor, fuse, cables, charger, DC converter, brakes, and tire rating. Save factory settings, calibrate the throttle, test wheels safely raised only as the manual allows, then perform a low-speed loaded test while monitoring temperature and pack behavior.
The on-the-fly programmer changes supported settings within configured limits. The app provides deeper supported setup and diagnostics. Neither should be used to defeat battery, motor, legal-speed, or braking limits. Confirm Forward and Reverse, throttle return, key and Tow/Run behavior, charger lockout, regen direction, and brake response before normal driving. Recheck cable torque after the first controlled heat cycle if the hardware maker specifies it.
Keep the final serial photo, kit part number, software version, parameter backup, wiring diagram, and supplier fitment confirmation with the cart. That record makes later service safer and prevents a future owner from ordering against body style alone. Finish with repair guides if faults remain.
Reviewed and updated July 30, 2026 by the Golf Cart Lab team.