ICON Golf Cart Error Codes: Code List, Meanings and Fixes
If your ICON dash shows a warning or the controller LED is blinking a two digit fault, use this table to translate the code into the system to test first.
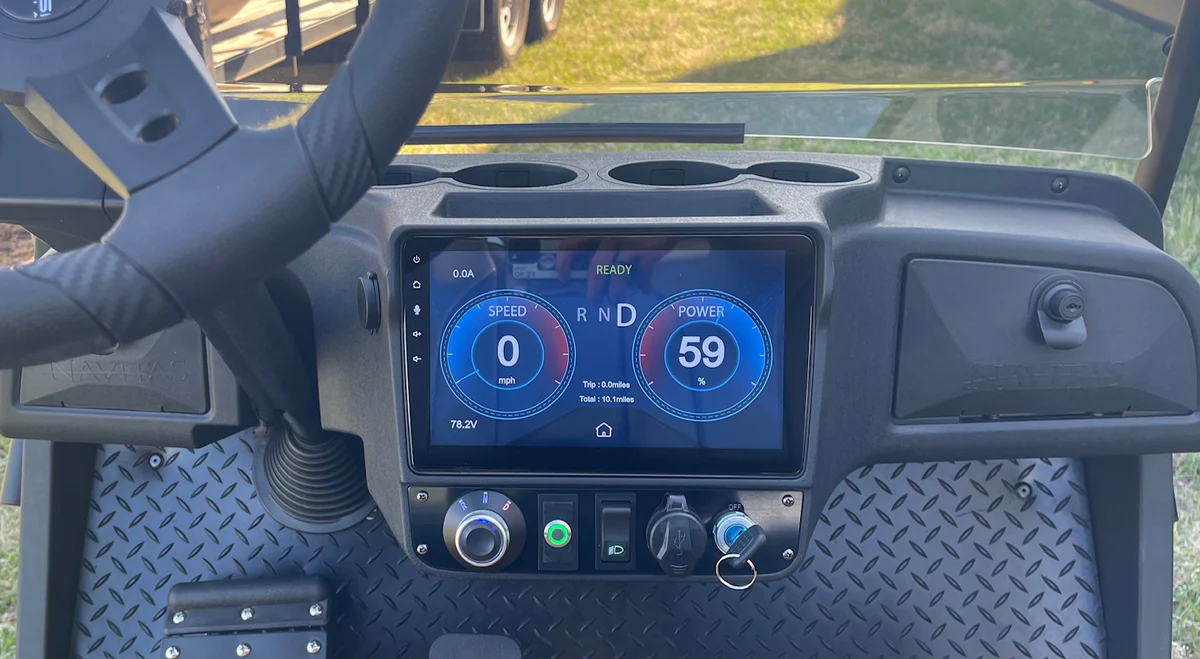
- Do not diagnose an ICON fault from the icon alone. Get the dash warning and the two digit controller blink code when available.
- Common useful codes include 23 for battery voltage sag, 36 for motor speed feedback, 39 for contactor failure, 41/42 for throttle signal faults, and 47 for high pedal disable or sequencing.
- Codes 51-67 are OEM-defined, so an ICON dealer or controller tool must read the stored ICON-specific text.
- A code that returns after one key cycle is a live fault. Fix the circuit first, then clear it.
Modern ICON carts use a digital dash and a controller fault system. The dash may show a warning icon, but the controller code is usually the better clue because it points to the actual circuit: battery voltage, throttle, contactor, motor sensor, temperature, brake, controller memory, or OEM-specific BMS/display logic.
ICON does not publish a complete owner-facing public fault table for every dash and BMS message. Current ICON i-series product pages list a 450A ICON controller and 48V 5kW 3-phase motor, while controller fault logic in this class uses two digit codes. Use the table below as a practical service map, then confirm OEM-only codes with an ICON dealer or controller scan tool.
How to Read an ICON Fault Code
Start with the dash, but do not stop there. Many ICON carts show a general warning icon while the controller stores the more useful number. On controllers with a status LED, a two digit code is flashed as the first digit, a pause, then the second digit. For example, four flashes, pause, seven flashes means code 47.
- Photograph the dash: Capture the icon, wording, and state of charge before cycling the key.
- Check the controller LED: Lift the seat and look for the repeating blink pattern on the controller or nearby status indicator.
- Write down when it happens: Startup, charging, pressing the pedal, braking downhill, and climbing all point to different circuits.
- Do one key cycle only: If the same code returns, treat it as a live fault instead of repeatedly resetting it.
ICON Golf Cart Error Code Table
This table gives actual code meanings and first checks for the controller-code family commonly used on AC golf carts. If your ICON display shows a plain text warning instead of a number, match the symptom to the closest row and have the stored code pulled if the cart is still under warranty.
| Code | Meaning | What It Usually Means on an ICON | First Fix / Test |
|---|---|---|---|
| 12 | Controller overcurrent | High current event, possible motor phase short, noisy speed sensor, or controller fault. | Stop driving. Inspect motor U/V/W cables for rubbing, looseness, water, or heat damage. |
| 13 | Current sensor fault | Controller sees current leakage or an internal current measurement fault. | Check for motor cable damage or frame leakage. Dealer test if it returns. |
| 14 | Precharge fault | Controller capacitor bank did not charge correctly before closing the main contactor. | Check pack voltage, main fuse, contactor circuit, and any accessory wired across B+. |
| 15 | Controller severe undertemp | Controller temperature is below its allowed operating range. | Warm the cart and retest. Persistent code means temp sensor/controller issue. |
| 16 | Controller severe overtemp | Controller is too hot; cart may shut down to protect itself. | Let it cool. Check dragging brake, overloaded cart, blocked airflow, or hard hill use. |
| 17 | Severe B+ or key-switch undervoltage | Pack or key-switch voltage fell too low for drive. | Charge fully, load-test the pack, inspect B+ fuse, main switch, and key-switch wiring. |
| 18 | Severe B+ or key-switch overvoltage | Pack voltage is too high or regen is pushing voltage above limit. | Do not keep driving downhill on a full pack. Verify charger profile and pack voltage. |
| 22 | Controller overtemp cutback | Limp mode Controller is hot enough to reduce power. | Cool down, check load, tire pressure, brake drag, hills, and controller mounting area. |
| 23 | B+ undervoltage cutback | Common Battery voltage sag. Cart slows or loses torque. | Charge pack, then test voltage under acceleration. Suspect weak battery/cell or loose high-current cable. |
| 24 | B+ overvoltage cutback | Regen braking or charger/pack issue is driving voltage too high. | Check voltage after charging. Avoid long downhill regen immediately after a full charge. |
| 25 | 5V supply fault | Sensor supply is pulled down, often by a shorted sensor or harness. | Inspect throttle, brake, speed sensor, and accessory harnesses for pinched wiring. |
| 28 | Motor temperature hot cutback | Motor is hot and the controller is reducing drive torque. | Let the motor cool. Check hauling load, tire size, brake drag, and steep hill use. |
| 29 | Motor temperature sensor fault | Motor thermistor circuit is open, shorted, unplugged, or reading wrong. | Inspect motor temp sensor connector and harness near the motor. |
| 31 | Main/coil driver open or short | Main contactor or driver load circuit has an open/short or dirty connector. | Inspect contactor coil wiring, connector pins, and harness crimps. |
| 32 | EM brake open or short | Electromagnetic brake circuit is open, shorted, or not being driven correctly. | Check brake release lever position, EM brake wiring, connector, and coil resistance. |
| 33-35 | Driver open/short | Auxiliary driver circuit problem in a coil/proportional output. | Inspect harnesses and any added accessories tied into controller outputs. |
| 36 | Encoder / motor speed sensor | Common Motor speed feedback is missing, noisy, or implausible. | Inspect speed sensor/encoder plug at the motor. Look for water, loose pins, and damaged cable. |
| 37 | Motor open | One motor phase is open or has bad high-current wiring. | Check U/V/W motor cables for loose lugs, broken conductor, or burnt terminal. |
| 38 | Main contactor welded | Controller thinks the contactor is stuck closed or there is an alternate precharge path. | Do not keep cycling it. Test contactor tips and check for added wiring across B+. |
| 39 | Main contactor did not close | No drive Contactor failed to close, tips are oxidized, fuse is blown, or precharge failed. | Listen for click. Test pack voltage at contactor, coil command, B+ fuse, and contactor output. |
| 41 | Throttle wiper high | Pedal/throttle signal is above expected range. | Inspect pedal sensor plug, 5V reference, signal wire, and water intrusion behind the pedal. |
| 42 | Throttle wiper low | Pedal/throttle signal is below expected range. | Check for unplugged pedal sensor, broken ground, damaged signal wire, or failed sensor. |
| 43 | Pot2 wiper high | Second analog input, often brake or auxiliary pedal input, is too high. | Check brake/secondary sensor wiring and connector. |
| 44 | Pot2 wiper low | Second analog input is too low. | Check for open ground, unplugged connector, corrosion, or wrong sensor value. |
| 45 | Pot low overcurrent | Throttle low/reference circuit is drawing too much current. | Look for shorted pedal wiring or water in the pedal harness connector. |
| 46 | EEPROM fault | Controller memory write/configuration problem. | Key cycle once. If it returns, stop and have the controller scanned. |
| 47 | High pedal disable / sequencing | Common Pedal, key, run, interlock, or F/N/R inputs were applied in the wrong order or one is stuck. | Release pedal, select neutral, key off/on. If it returns, test pedal switch, F/N/R switch, run switch, and wiring. |
| 49 | Parameter change | Controller parameter changed and requires a key cycle before operation. | Cycle key. If not recently programmed, dealer should check controller settings. |
| 51-67 | OEM-defined faults | Dealer code Manufacturer-specific ICON logic, often display/BMS/interlock/software dependent. | Record the exact dash message and have an ICON dealer or controller tool read the stored text. |
| 68 | VCL runtime error | Controller application code hit a runtime error. | Dealer scan. Do not replace parts until the VCL/module detail is read. |
| 69 | External supply out of range | 5V/12V external supply draw is too high or too low. | Disconnect recent accessories, then inspect sensor/accessory circuits for shorts. |
| 71 | OS general fault | Internal controller operating-system fault. | Key cycle once. Persistent code means dealer/controller repair path. |
| 73 | Stall detected | Motor commanded to move but encoder/motor movement is not detected. | Check brake locked, motor sensor, encoder wiring, and whether cart is mechanically stuck. |
| 77-83 | Supervisor / calibration / driver supply faults | Internal controller safety, calibration, or driver supply issue. | Dealer scan. Check for moisture in switch inputs if intermittent. |
| 87 | Motor characterization fault | Controller motor setup/characterization failed or does not match the motor. | Dealer programming issue unless it appeared after controller/motor replacement. |
| 88 | Encoder pulse count | Encoder pulse count does not match expected motor setup. | Inspect encoder/speed sensor wiring. Dealer must verify motor/controller parameters. |
| 89 | Motor type fault | Controller motor type parameter is out of range or wrong. | Dealer programming issue, especially after controller replacement. |
| 91 | VCL / OS mismatch | Controller application software does not match operating software. | Dealer reflash or controller replacement path. |
| 92 | EM brake failed to set | Vehicle moved after the electromagnetic brake was commanded to hold. | Check EM brake, release lever, brake wiring, and hill roll behavior. |
| 93 | Encoder LOS | Limited operating strategy due to encoder fault or stall. | Treat as a speed sensor/encoder/stall problem. Inspect motor sensor wiring first. |
| 94 | Emergency reverse timeout | Emergency reverse input stayed active or timed out. | Check reverse/interlock inputs and stuck switches. |
| 98 | Illegal model number | Controller software/hardware mismatch or defective controller. | Dealer/controller programming check. |
| 99 | Parameter mismatch | Controller parameters do not match the configured drive setup. | Dealer programming check, especially after parts swap. |
What About ICON BMS and Dash-Only Codes?
Some ICON lithium faults are not generic controller codes. Codes in the 51-67 group are OEM-defined in the controller-code family, which means ICON can use them for manufacturer-specific logic. That is where battery-management, display, interlock, and software messages may live depending on model year and pack supplier.
If the cart shows a battery or BMS warning but no public number, record the display message, pack state of charge, charger behavior, ambient temperature, and whether the cart drives. On lithium ICON carts, avoid forcing repeated resets if the BMS has opened the pack contactor. The battery may be protecting a cell, a temperature limit, or a communication fault that needs dealer history data.
What to Do Before Buying Parts
- Charge and measure the pack. Many “controller” faults start as code 17 or 23 voltage sag. Check resting voltage and voltage under acceleration.
- Inspect the pedal connector. Codes 41, 42, 45, and 47 often come from the low-mounted pedal harness getting wet, corroded, or partly unplugged.
- Listen for the contactor. Code 39 points at the main contactor, fuse, or precharge path. No click is a different diagnosis than a click with no drive.
- Check the motor sensor plug. Codes 36, 73, 88, and 93 often trace to speed sensor or encoder wiring at the motor.
- Respect brake faults. Codes 32 and 92 involve the electromagnetic brake. Do not bypass a brake fault just to make the cart move.
- Use the dealer for OEM codes. If you see 51-67, 68, 71, 77-83, 87-91, 98, or 99, stop guessing and get the stored detail read.
For an ICON that will not drive, start with the exact code. 23 means voltage sag, 36 means motor speed feedback, 39 means contactor did not close, 41/42 mean throttle signal, and 47 means pedal/input sequencing. Fix that circuit first, then key cycle once to confirm the code stays gone.
Sources and References
This guide cross-checks ICON model hardware and service cautions against the ICON i20X product specifications, the ICON EV Owner’s Manual, and the Curtis controller fault-code translator for 1236SE. ICON-specific OEM codes still require the dealer tool or ICON service documentation for the final stored-fault text.
Frequently Asked Questions
Where do I find an ICON golf cart error code?
Check the dash first, then check the controller status LED under the seat. A two digit controller code is usually blinked as the first digit, a pause, then the second digit.
What does code 47 mean on an ICON golf cart?
Code 47 is high pedal disable or sequencing. Release the accelerator, place the cart in neutral, key cycle it, and inspect the pedal switch, F/N/R switch, interlock, and wiring if it returns.
What does code 39 mean on an ICON cart?
Code 39 means the main contactor did not close. Check whether the contactor clicks, then test the contactor coil, high-current B+ fuse, pack voltage, and burned or oxidized contactor tips.
What do ICON codes 51 through 67 mean?
Those are OEM-defined controller faults. On an ICON, record the dash message and have the stored fault read with the correct dealer/controller tool instead of using a generic table.